




















Integrating the Dashboard Designer into an Application
Our sample projects and report templates can help you learn the basics of working with our products.This example is outdated, you can check out the many other new examples in this category.This example shows how to integrate the dashboard designer into a React application. First of all, load scripts:
Then, create a
Finally, use
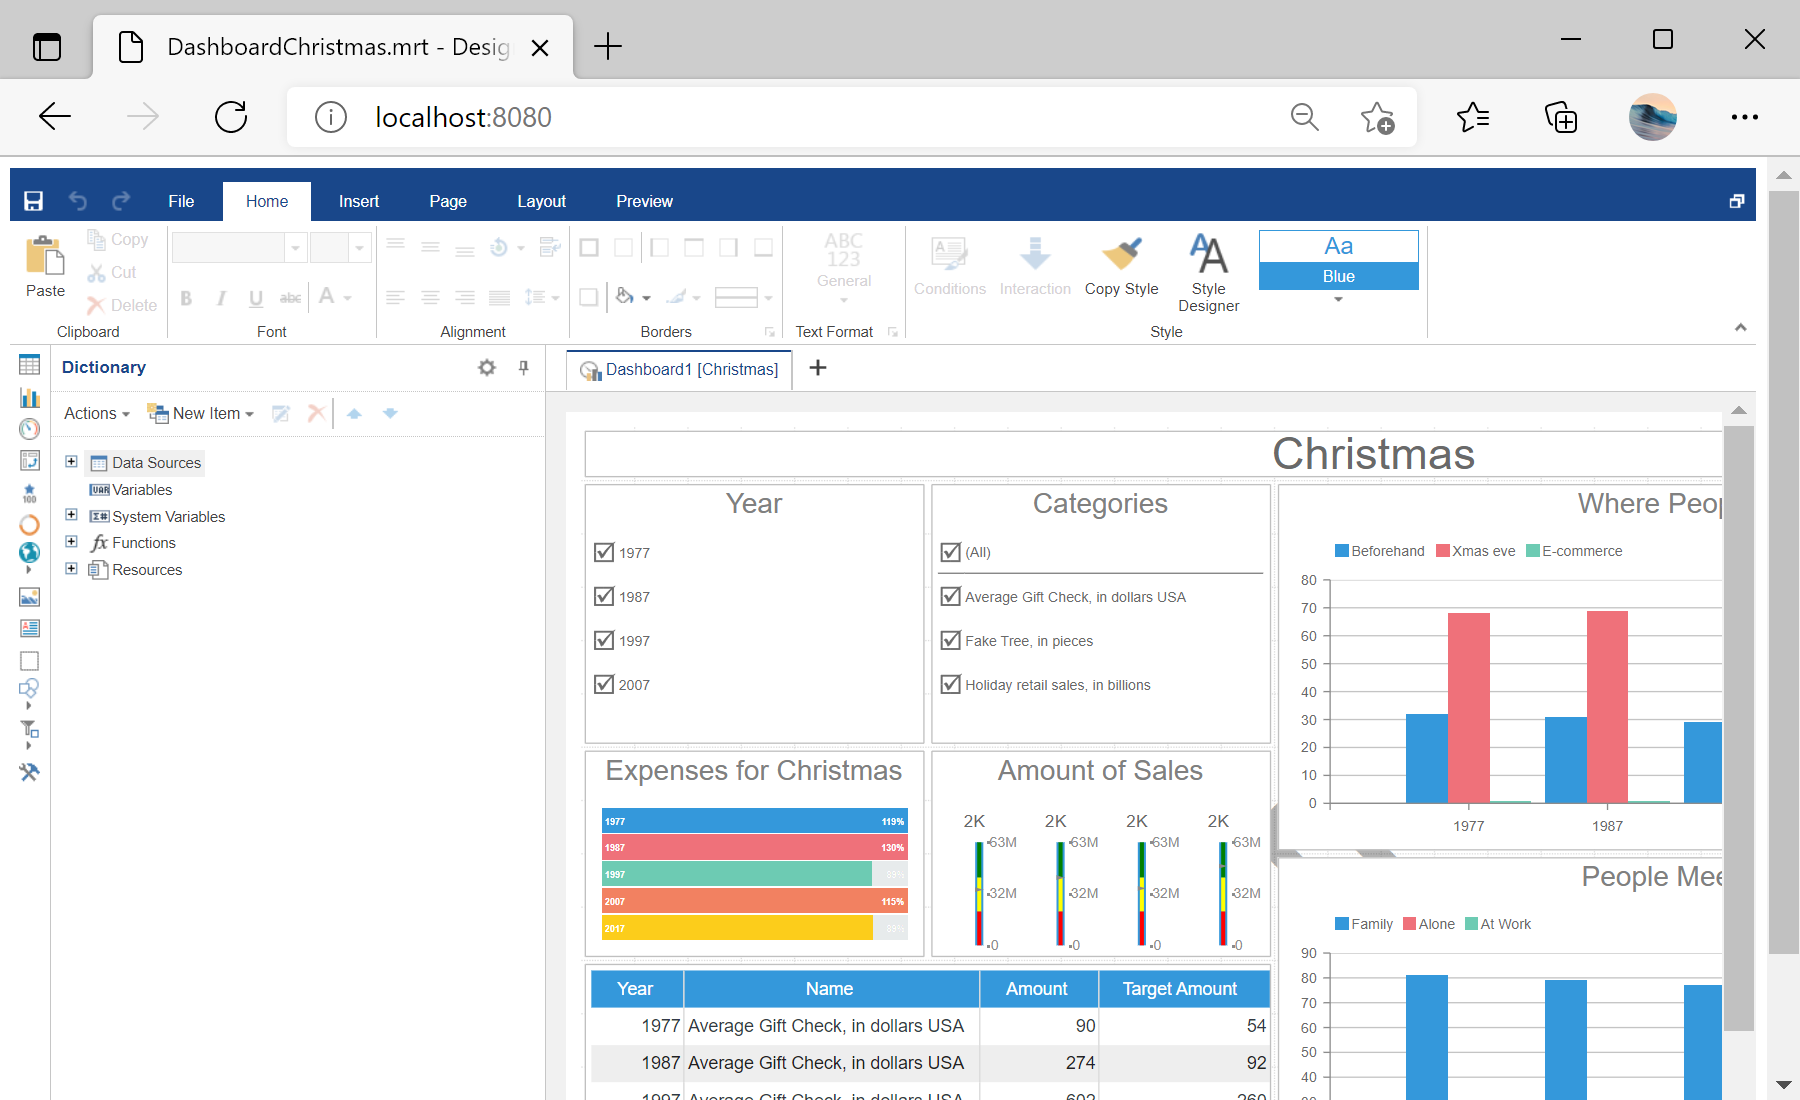
In the screenshot below you can see the result of the sample code:
<script src="/stimulsoft/stimulsoft.reports.js"></script>
<script src="/stimulsoft/stimulsoft.dashboards.js"></script>
<script src="/stimulsoft/stimulsoft.viewer.js"></script>
<script src="/stimulsoft/stimulsoft.designer.js"></script>
<script src="/stimulsoft/stimulsoft.blockly.js"></script>
Then, create a
Designer class which extends from React component:
<script type="text/babel">
	class Designer extends React.Component {
		render() {
			return <div id="designer"></div>;
		}

		componentDidMount(){
			console.log('Loading Designer view');

			console.log('Set full screen mode for the designer');
			var options = new window.Stimulsoft.Designer.StiDesignerOptions();
			options.appearance.fullScreenMode = false;

			console.log('Create the dashboard designer with specified options');
			var designer = new window.Stimulsoft.Designer.StiDesigner(options, 'StiDesigner', false);

			console.log('Create a new dashboard instance');
			var report = window.Stimulsoft.Report.StiReport.createNewDashboard();

			console.log('Load dashboard from url');
			report.loadFile('dashboard/DashboardChristmas.mrt');

			console.log('Edit dashboard template in the designer');
			designer.report = report;

			designer.renderHtml("designer");
		}
	}

...
Finally, use
ReactDOM.render to update the component:
...

	ReactDOM.render(
		<Designer />,
		document.getElementById("main")
	)
</script>
In the screenshot below you can see the result of the sample code: