




















In today’s article, we will talk about how to configure a list of formats for exporting a report or dashboard, as well as how to set default export parameters. This feature was introduced in version 2024.4, although very few people are aware of it. Looking ahead, we won’t be writing a single line of code, and every step will be performed in the report designer. We’ll cover this in detail below.
Before 2024.4
In Stimulsoft embedded components, and especially in the viewer, the ability to configure the list of export formats for reports and dashboards has been available for quite a long time, as well as the ability to set the default export settings. However, there were two important limitations. Firstly, all the steps were performed in the app’s code with the help of the Viewer component options. Secondly, the settings were independent of the viewed template and applied to all the reports and dashboards that are loaded into the viewer.What was changed in 2024.4
Previously available features for Stimulsoft embedded components weren’t removed. You can still set the list of formats and export settings in the viewer. But a new feature was added – now the user can configure the list of export formats for a specific report and set export settings for a specific template in the designer, without writing any code. While doing so, all the export settings are saved in the report itself.Configuring export settings in the designer
To configure export settings, you should open the report template in Stimulsoft Designer and access the template properties by selecting the gray area between the page and the Properties panel, or select the Properties command on the Report tab on the Ribbon-interface. Then, on the Properties panel find the Export Settings option and press the Browse button. After that, the editor where you can configure the list of export formats and their settings will open.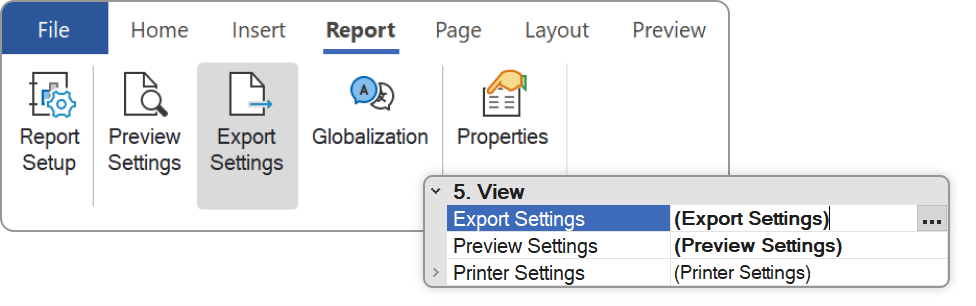
Export settings editor
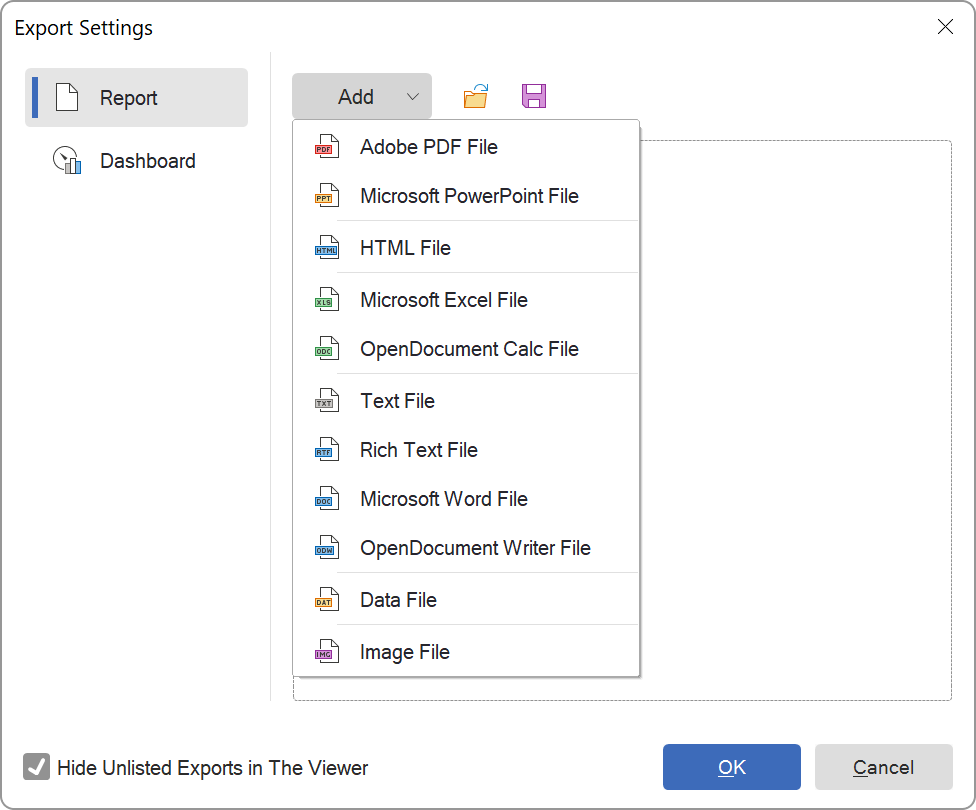
There are two tabs in the editor – Report and Dashboard. This is done due to the fact that the same template can contain both a report and a dashboard. And although some available export formats for reports and dashboards are the same, their export settings are different. That makes the first rule – export settings for reports and dashboards are configured separately.To add any available format into the list, you should just select it in the Add menu, and after that the chosen type will be displayed in the list. Now, if you select this export format, all its parameters will be displayed on the properties panel, where you can change the required options for the export.
 An important thing
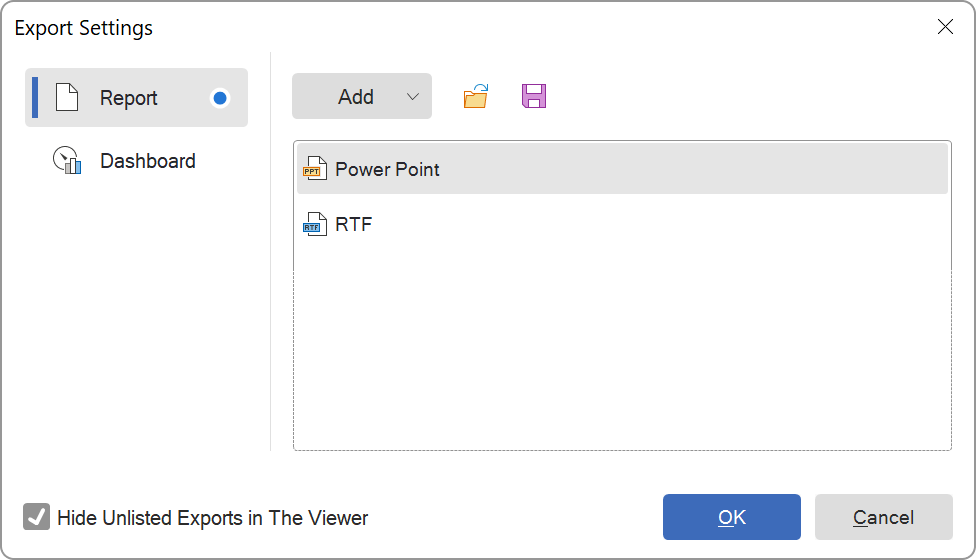
If an export format has been added, the Export Settings menu will not be displayed when this format is selected in the viewer. The Hide Unlisted Exports in the Viewer option is important too. It determines which list of formats will be displayed in the Save menu in the viewer. If this setting is enabled, then the Save menu will only contain the added formats. If not, the Save menu in the viewer will contain the full list of export formats, with the only difference being that for the added formats, the export settings will be exactly as specified during configuration. And for the rest of the export formats, the Export Settings menu will be opened.
Saving and opening export settings
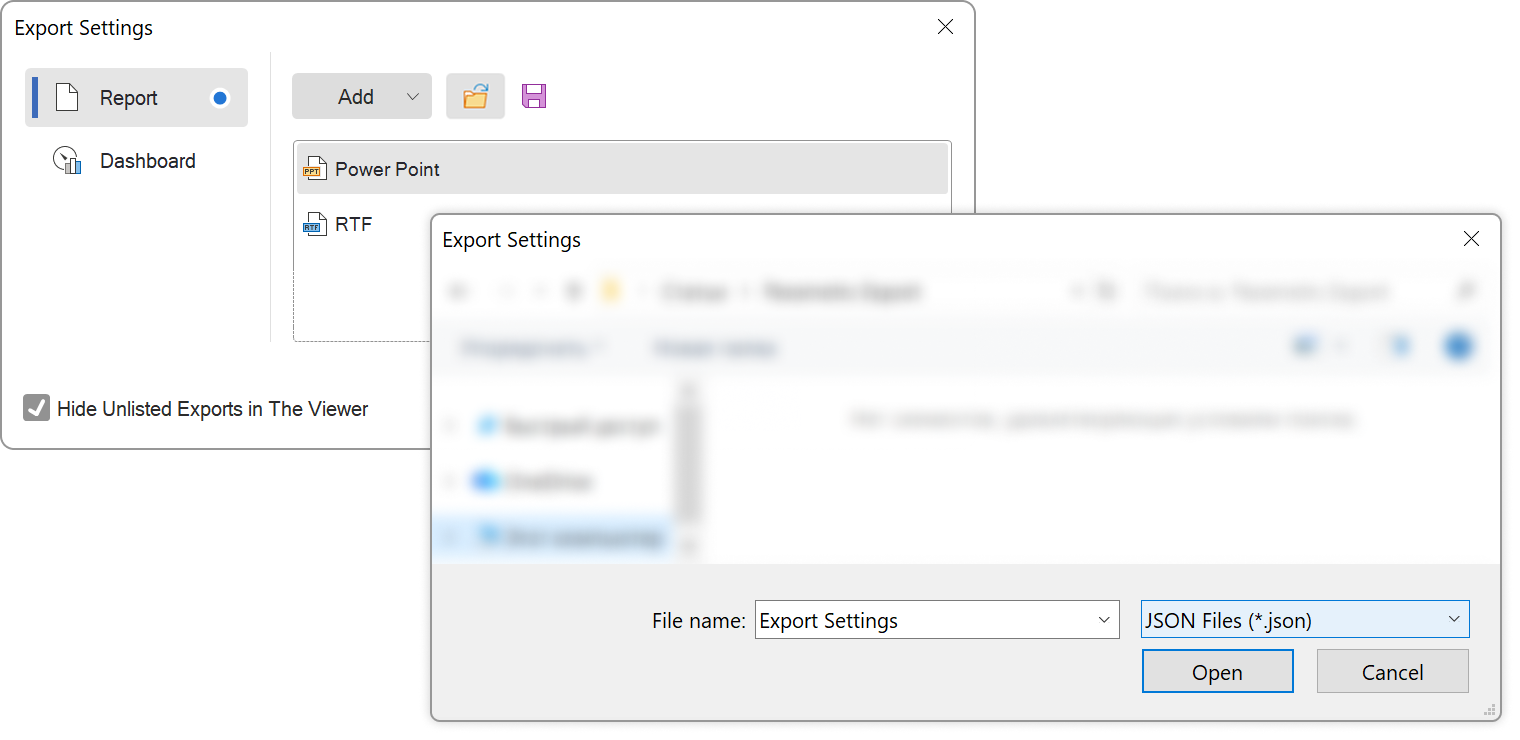
As mentioned earlier, any settings configured in a specific report or dashboard apply only to that report or dashboard, unlike, for instance, the settings for the Viewer component. And it is vital to mention that there is a way to retrieve these settings: once the list of export formats has been configured and their parameters have been defined, all of this can be saved to a JSON file. To do this, just press the Save button in the editor.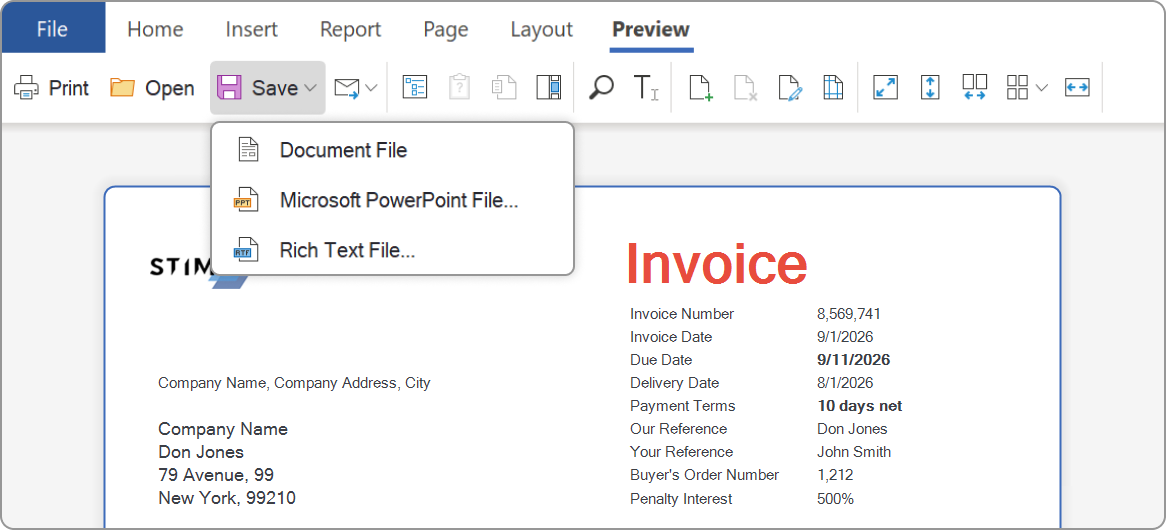
Obviously, once the settings have been saved, they can be retrieved from the file. For this purpose, the Export Settings editor includes an Open button. Clicking it will open the file explorer, where you should select the JSON file containing the export settings. Thus, even though these settings were created for a specific report, a mechanism for applying them to other templates exists.
Export settings priority
A very important point is the priority between the settings for a specific report and the settings for the built-in component. Consider the following situation: for example, certain settings for exporting to PDF are specified in the built-in Viewer component, but a template with different settings for exporting to the same format is loaded into the viewer. The logic here is simple: all reports use the settings of the built-in component by default. However, if someone has set the export options for a specific report, then exactly these settings will be prioritized. It’s important to keep this in mind when exporting reports and dashboards.Thus, starting with version 2024.4, the list of export formats and their settings can be configured not only in the application code via the Viewer component options, but also directly in the designer for a specific report template or dashboard, without writing a single line of code. These settings are saved within the template itself and can be exported and imported as a JSON file, allowing them to be transferred between different reports. And the main thing to remember: if the export settings are specified in both the viewer and the template, the template settings will always be prioritized.