Integrating the Dashboard Viewer into an Application
Our sample projects and report templates can help you learn the basics of working with our products.This example shows how to integrate the dashboard viewer into a Vue.js 3 application. First of all, load scripts:
Then, create the dashboard viewer with specified options:
Next, create a new dashboard instance and load dashboard:
After that, render the viewer to selected element:
Finally, show the viewer:
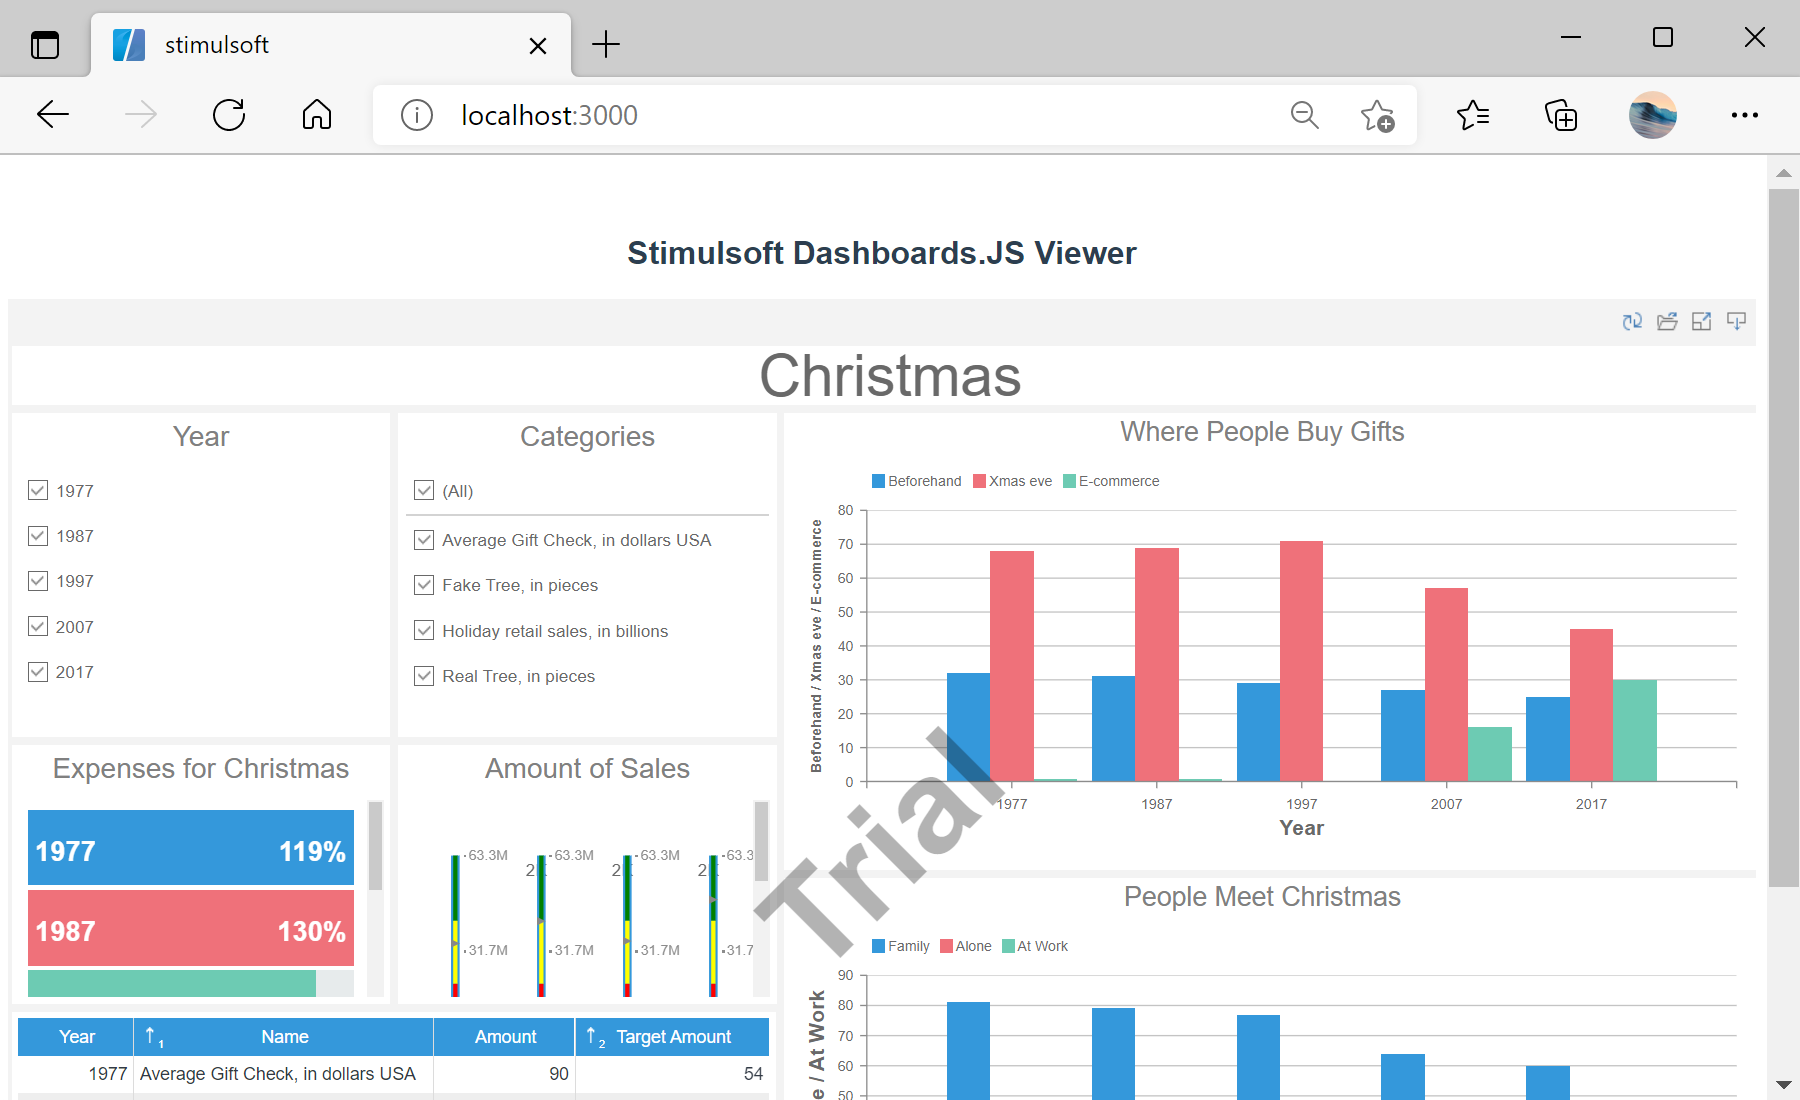
In the screenshot below you can see the result of the sample code:
import { onMounted } from "vue";
import { Stimulsoft } from "stimulsoft-dashboards-js/Scripts/stimulsoft.blockly.editor";
import 'stimulsoft-dashboards-js/Css/stimulsoft.viewer.office2013.whiteblue.css';
Then, create the dashboard viewer with specified options:
onMounted(() => {
	console.log('Loading Viewer view');

	console.log('Creating the dashboard viewer with default options');
	var viewer = new Stimulsoft.Viewer.StiViewer(undefined, 'StiViewer', false);

...
Next, create a new dashboard instance and load dashboard:
...

	console.log('Creating a new dashboard instance');
	var report = Stimulsoft.Report.StiReport.createNewDashboard();

	console.log('Load dashboard from url');
	report.loadFile('/dashboard/DashboardChristmas.mrt');

	console.log('Assigning dashboard to the viewer, the dashboard will be built automatically after rendering the viewer');
	viewer.report = report;

...
After that, render the viewer to selected element:
...

	console.log('Rendering the viewer to selected element');
	viewer.renderHtml('viewer');

	console.log('Loading completed successfully!');
});
Finally, show the viewer:
<div id="viewer"></div>In the screenshot below you can see the result of the sample code: