In this tutorial I will give you how easy it is to save reports created and edited with Stimulsoft Reports Designer.Web on the web server.
Stimulsoft reports has a web based report designer component that provides full report editing capabilities inside a web browser. Thanks to this component called Designer.Web you can now allow end users to edit reports to their requirements and save the report definition locally or on the server. The best part of the Designer.Web is drag and drop deployment, all you need to do is insert the designer component on an ASP.net web form and write one line of code to start allowing users to edit existing report or create their own reports. This feature would be extremely useful for minor changes that would normally require developer intervention such as changing color, font or alignment of text or adding a new field to the table or changing the location of the paging number.
The salient features of Stimulsoft Reports Designer.Web are:
1. Platform independent (runs on Adobe Flash);
2. Drag and drop implementation and deployment;
3. Option of saving report definition on the web server or on user's computer;
4. Extremely useful for minor changes and updates by end users;
5. Extremely useful for global development teams.
The official documentation and training videos can be found at:
Video Tutorials: http://www.stimulsoft.com/en/videos
User Manual: http://www.stimulsoft.com/en/documentation
Download latest version of Report Designer.Web from http://www.stimulsoft.com/en/downloads
The data for this sample report will come from the AdventureWork sample database provided by Microsoft.
In this tutorial I will show you how easy it is to use the web designer with the following activities
1. How to add StiWebDesigner and other controls to the web page
2. Show list of reports when page loads
3. Show report on listbox selection
4. Show web report designer
5. Edit selected report
6. Save report file on the server
7. Create new report and view it
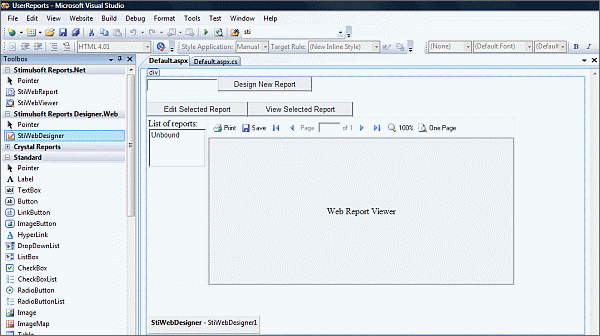
1. Add StiWebDesigner and other controls to your web page
2. Show list of reports when page loads

Notes:
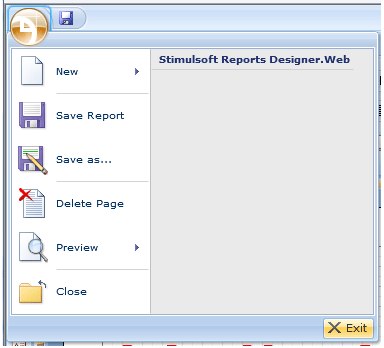
1. Save As is used to download the report definition on local user's drive;
2. Save is used to save the report on the server side.
Stimulsoft reports has a web based report designer component that provides full report editing capabilities inside a web browser. Thanks to this component called Designer.Web you can now allow end users to edit reports to their requirements and save the report definition locally or on the server. The best part of the Designer.Web is drag and drop deployment, all you need to do is insert the designer component on an ASP.net web form and write one line of code to start allowing users to edit existing report or create their own reports. This feature would be extremely useful for minor changes that would normally require developer intervention such as changing color, font or alignment of text or adding a new field to the table or changing the location of the paging number.
The salient features of Stimulsoft Reports Designer.Web are:
1. Platform independent (runs on Adobe Flash);
2. Drag and drop implementation and deployment;
3. Option of saving report definition on the web server or on user's computer;
4. Extremely useful for minor changes and updates by end users;
5. Extremely useful for global development teams.
The official documentation and training videos can be found at:
Video Tutorials: http://www.stimulsoft.com/en/videos
User Manual: http://www.stimulsoft.com/en/documentation
Download latest version of Report Designer.Web from http://www.stimulsoft.com/en/downloads
The data for this sample report will come from the AdventureWork sample database provided by Microsoft.
In this tutorial I will show you how easy it is to use the web designer with the following activities
1. How to add StiWebDesigner and other controls to the web page
2. Show list of reports when page loads
3. Show report on listbox selection
4. Show web report designer
5. Edit selected report
6. Save report file on the server
7. Create new report and view it
1. Add StiWebDesigner and other controls to your web page
- Drag and Drop StiWebDesigner from the toolbox to your webpage;
- Add a listbox to show the list of reports;
- Add a StiWebViewer for users to view the report selected in the listbox;
- Add a textbox for users to enter the name of report;
- Add button for a creating new report, editing existing reports.
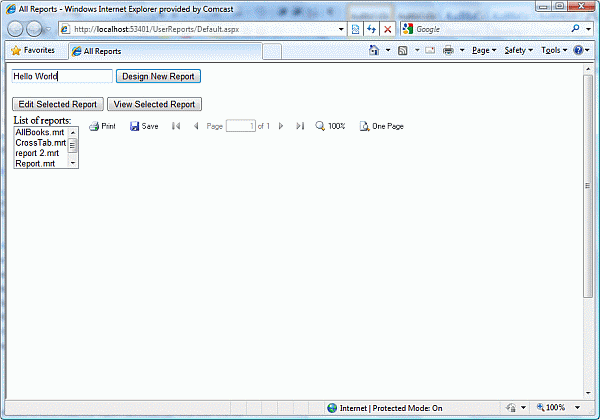
2. Show list of reports when page loads
- Copy all report files in the Reports Directory;
- Find all files in the reports folder that end with the "*.mrt" extension;
- Call the refreshReportsList function in the page load event fired and page is not postback.
protected void Page_Load(object sender, EventArgs e)
{
	if (!IsPostBack)
	{
		// Show list of all reports
		refreshReportsList();
	}
}

private void refreshReportsList()
{
	// Find all files with extension .mrt
	string[] reports = Directory.GetFiles(Server.MapPath("Reports"), "*.mrt");
	// Clear reports list
	lstReports.Items.Clear();
	// Loop through all files found and each file to reports list
	foreach (string reportpath in reports)
	{
		string filename = reportpath.Substring(reportpath.LastIndexOf("\\") + 1);
		lstReports.Items.Add(new ListItem(filename, reportpath));
	}
}- Add an onclick event handler for the listbox;
- Create an object of StiReport class;
- Load the report with the file path given in the selected list item;
- Set the report viewer's report source to the new.
<asp:ListBox ID="lstReports" runat="server" AutoPostBack="True" Width="100%"
	OnSelectedIndexChanged="lstReports_SelectedIndexChanged">
</asp:ListBox>
protected void lstReports_SelectedIndexChanged(object sender, EventArgs e)
{
if (lstReports.SelectedIndex > -1)
{
// Load report from the file path given in the selected item
StiReport oReport = new StiReport();
oReport.Load(lstReports.SelectedValue);
// Set report viewer's source to the loaded report
StiWebViewer1.Report = oReport;
StiWebViewer1.DataBind();
}
}- Add an onclick event handler for the "Design New Report" button;
- If the report already exists then load the file and allow users to edit the report;
- If the report does not already exist then create a new report file in the report file name.
protected void btnDesignNewReport_Click(object sender, EventArgs e)
{
	StiReport oNewRep = new StiReport();

	// Check if a report with the same name already exists
	string[] files = Directory.GetFiles(Server.MapPath("Reports"), txtNewReportName.Text + ".mrt");

	if (files.Length == 0)
	{
		// If the report deos not exist then set the report name
		oNewRep.ReportName = txtNewReportName.Text;
	}
	else
	{
		// If the report already exists then load the report into the designer
		oNewRep.Load(files[0]);
	}

	StiWebDesigner1.Design(oNewRep);
}- Add an onclick event handler for the "Edit Selected Report" button;
- Check if use has selected an item;
- Load the report file from the file path given the selected value;
- Set the report designer's source to the loaded report file.
protected void btnEditReport_Click(object sender, EventArgs e)
{
	if (lstReports.SelectedIndex > -1)
	{
		// Load the selected file
		StiReport oReport = new StiReport();
		oReport.Load(lstReports.SelectedValue);
		StiWebDesigner1.Design(oReport);
	}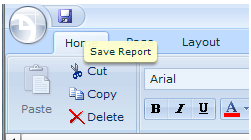
}- The StiWebDesigner control raises the OnSaveReport event when users click on the save icon in the Designer.Web;
- Add an even handler for the OnSaveReport event that takes StiSaveReportEventArgs as event arguments;
<cc2:StiWebDesigner ID="StiWebDesigner1" runat="server" OnSaveReport="StiWebDesigner1_SaveReport" />- Get the Report object from the event args sent the control;
- Save the report in the report directory with the filename same as the report name;
- Refresh the list of reports.
protected void StiWebDesigner1_SaveReport(object sender,
Stimulsoft.Report.Web.StiWebDesigner.StiSaveReportEventArgs e)
{
StiReport oRep = e.Report;
e.Report.Save(Server.MapPath("Reports\\" + oRep.ReportName + ".mrt"));
refreshReportsList();
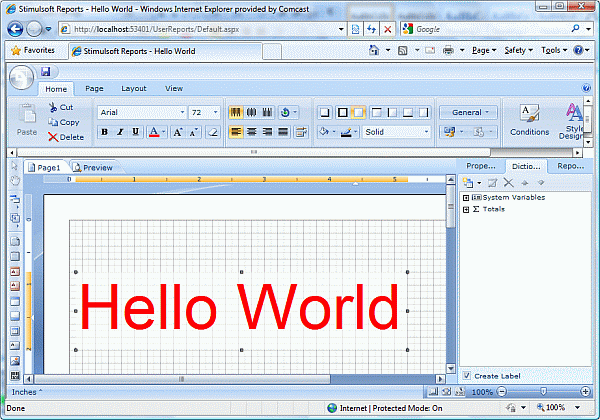
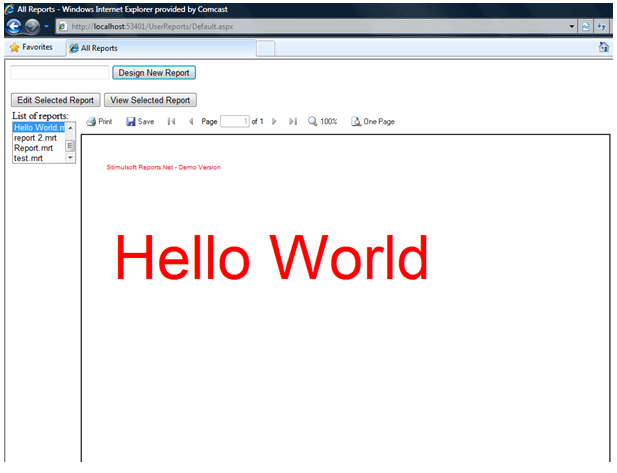
}- Press the "Start debugging" icon in Visual Studio or "F5" button;
- Type a name for the report that you want to create;
- Add a label to the report and type is "Hello World";
- Click on Save icon to save the report file on the server;
- Click on the Menu icon and click exit to return to the list of reports;
- Press F5 to refresh the list of reports;
- Select the newly created report in the list on reports to view it.
Notes:
1. Save As is used to download the report definition on local user's drive;
2. Save is used to save the report on the server side.