Today, we will address a common query about crafting report templates in our products: the red lines at the template page's end. Let's delve into this aspect, exploring it thoroughly, and also go deeper into the properties of Large Height and Large Height Factor. However, before diving in, let's take a moment to revisit the structure of the report.
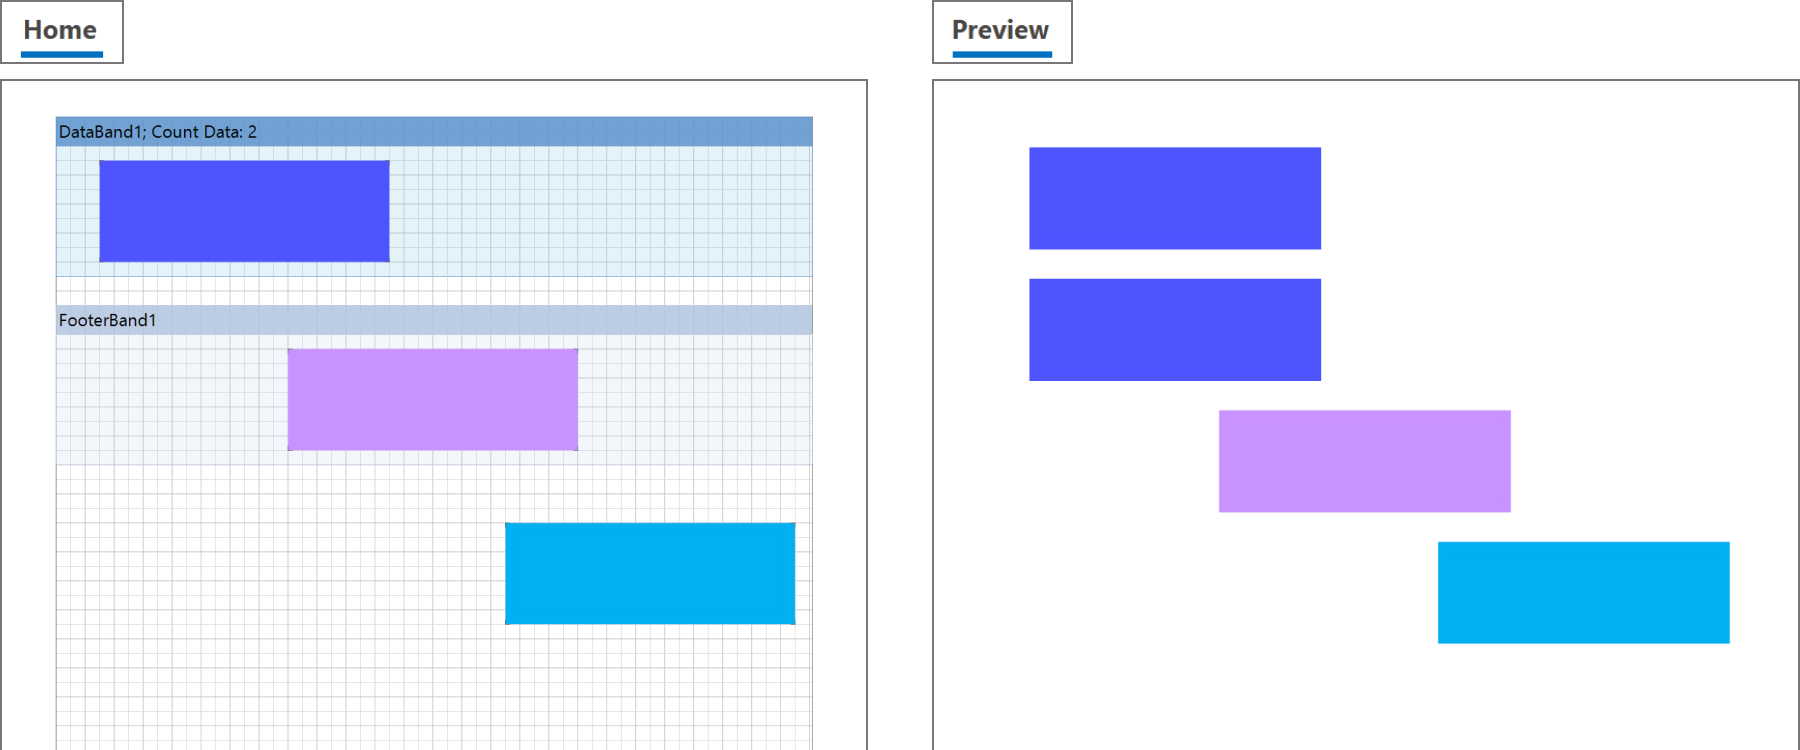
Most often, bands are associated with data tables. Depending on the amount of data, one band may be rendered in a different number of lines or may not be rendered at all if there is no data. If there are many lines, and they do not fit on one page of the template, then the engine creates another copy of the page and continues to place lines on it. If necessary, it creates another copy, and so on, until all lines of data are placed. Thus, one page of the template can result in several pages in the output document.
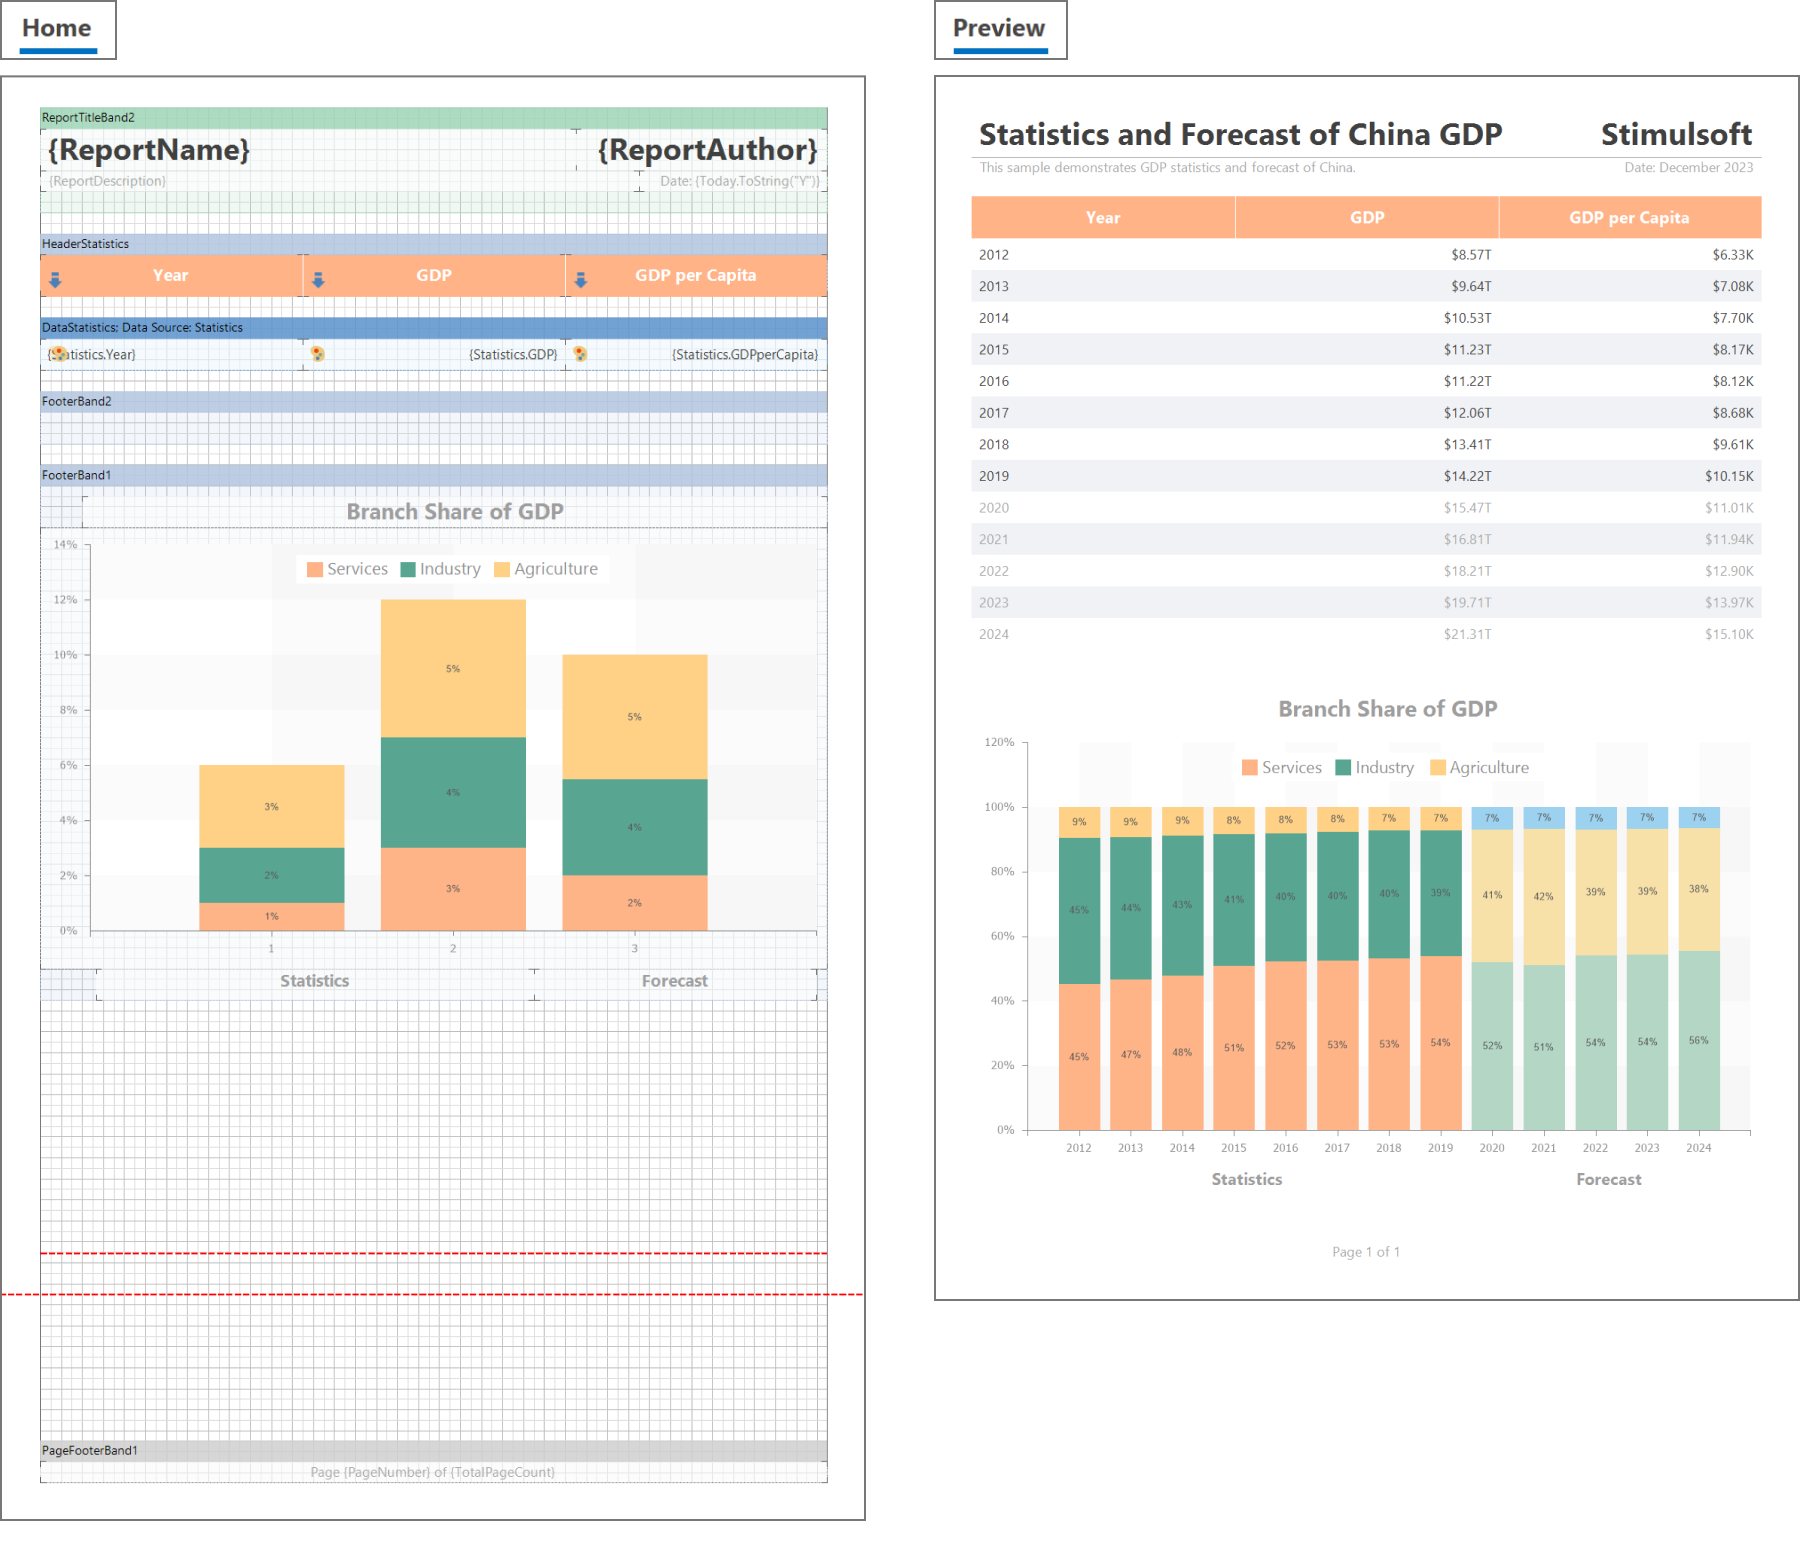
The physical dimensions of the page are established through the Page Size property of the report template page. This size applies to both the template page itself and its corresponding copy in the output document. Therefore, during the design-time, the template page is presented with accurate dimensions. This enables the placement of static components, such as background images and texts, in their intended positions. However, bands, being dynamic components not fixed to specific locations on the page, only reveal their positions during report rendering. Consequently, during the design process, bands are simply displayed sequentially from top to bottom. Moreover, for clarity, they are presented with headings and indents between them.
Bands that extend beyond the page are visually hidden beyond the screen's edge. To facilitate editing, we incorporated a specific feature into the designer - automatic adjustment of the page's visual height to accommodate the content. Here's how it functions: when the combined height of all bands on the page surpasses 70% of the page height, the page VISUALLY expands in height, ensuring at least 30% of the original size's free space remains. Consequently, all bands are visible on the page.
 Please note!
The physical dimensions of the template page and its copies REMAIN UNCHANGED! The page's height only VISUALLY increases during the editing process within the designer.
These lines assist in accurately placing static components on the page, such as positioning a logo in the bottom corner.
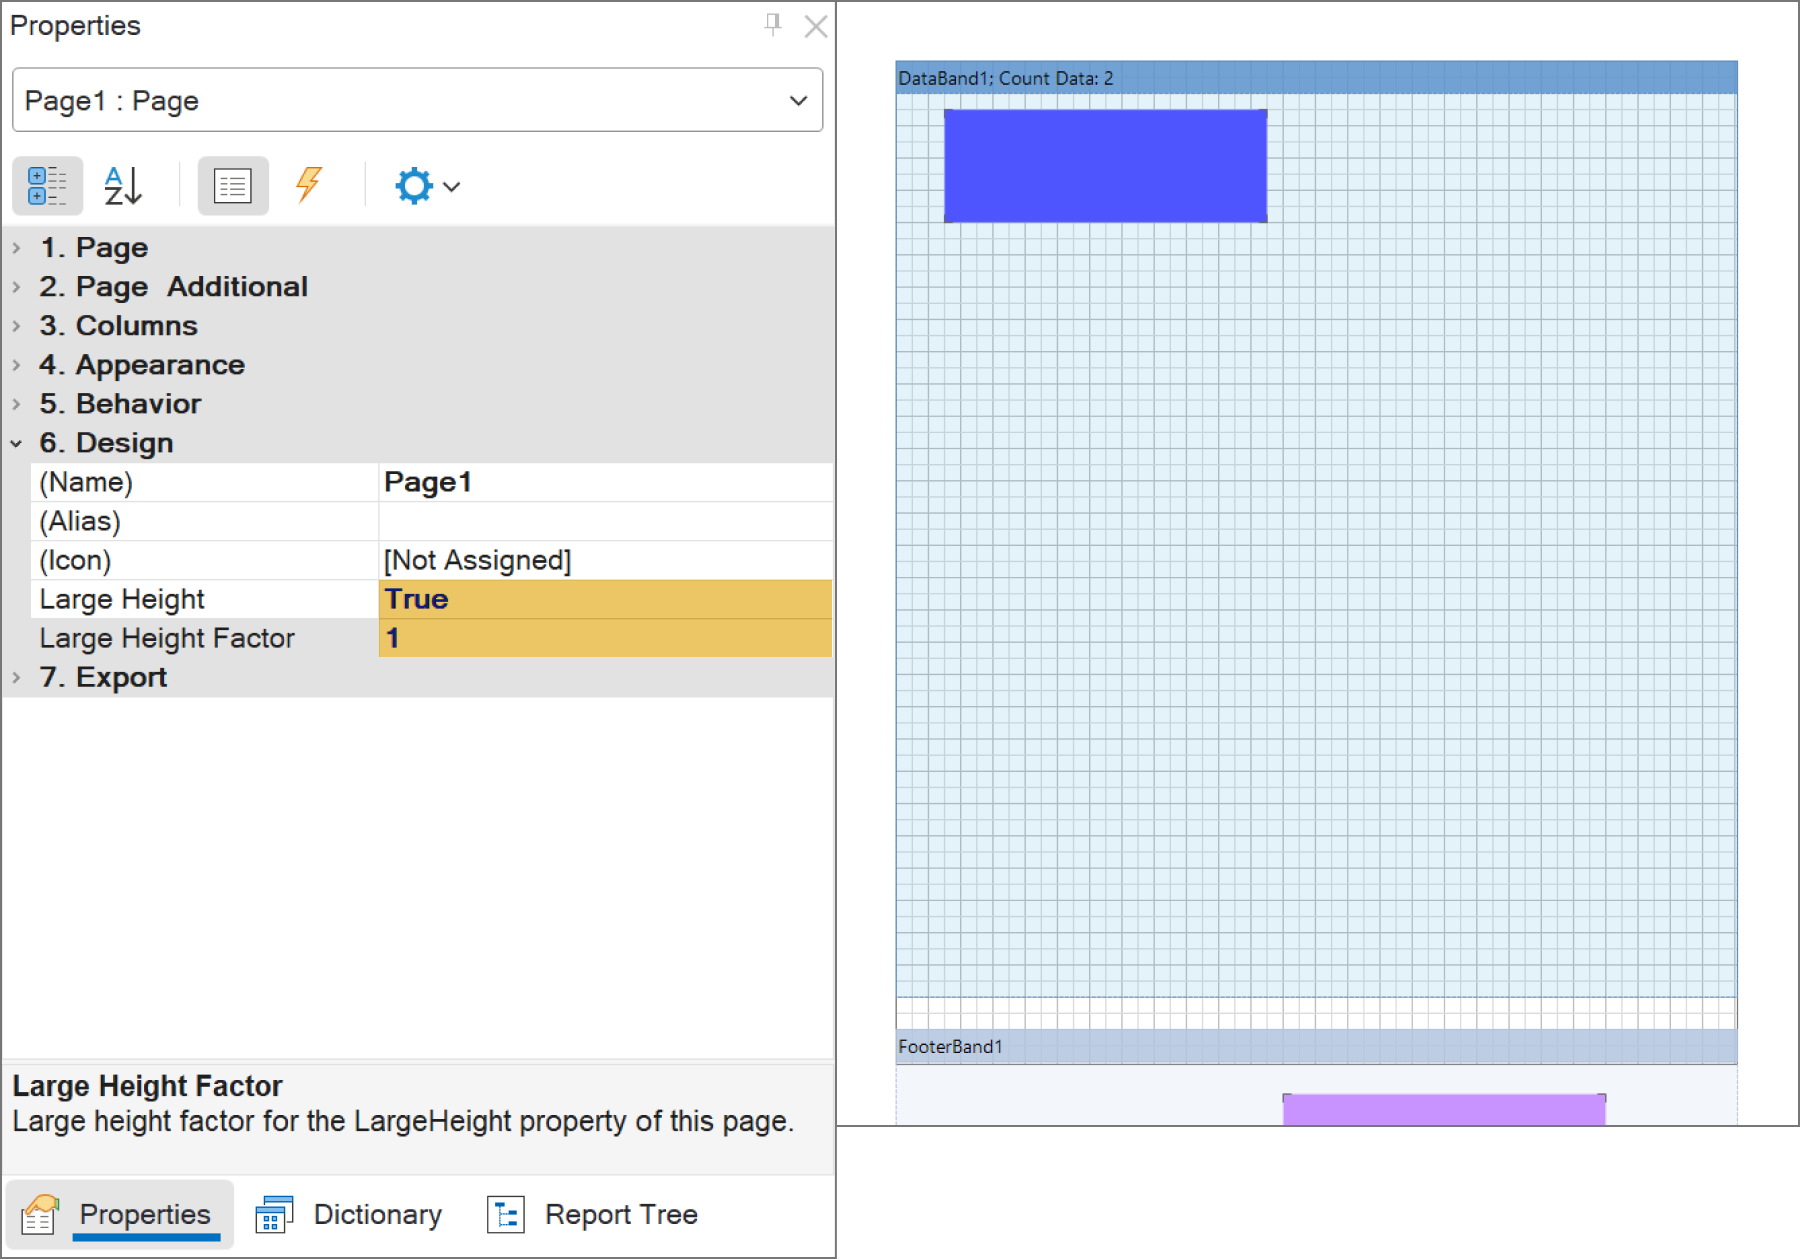
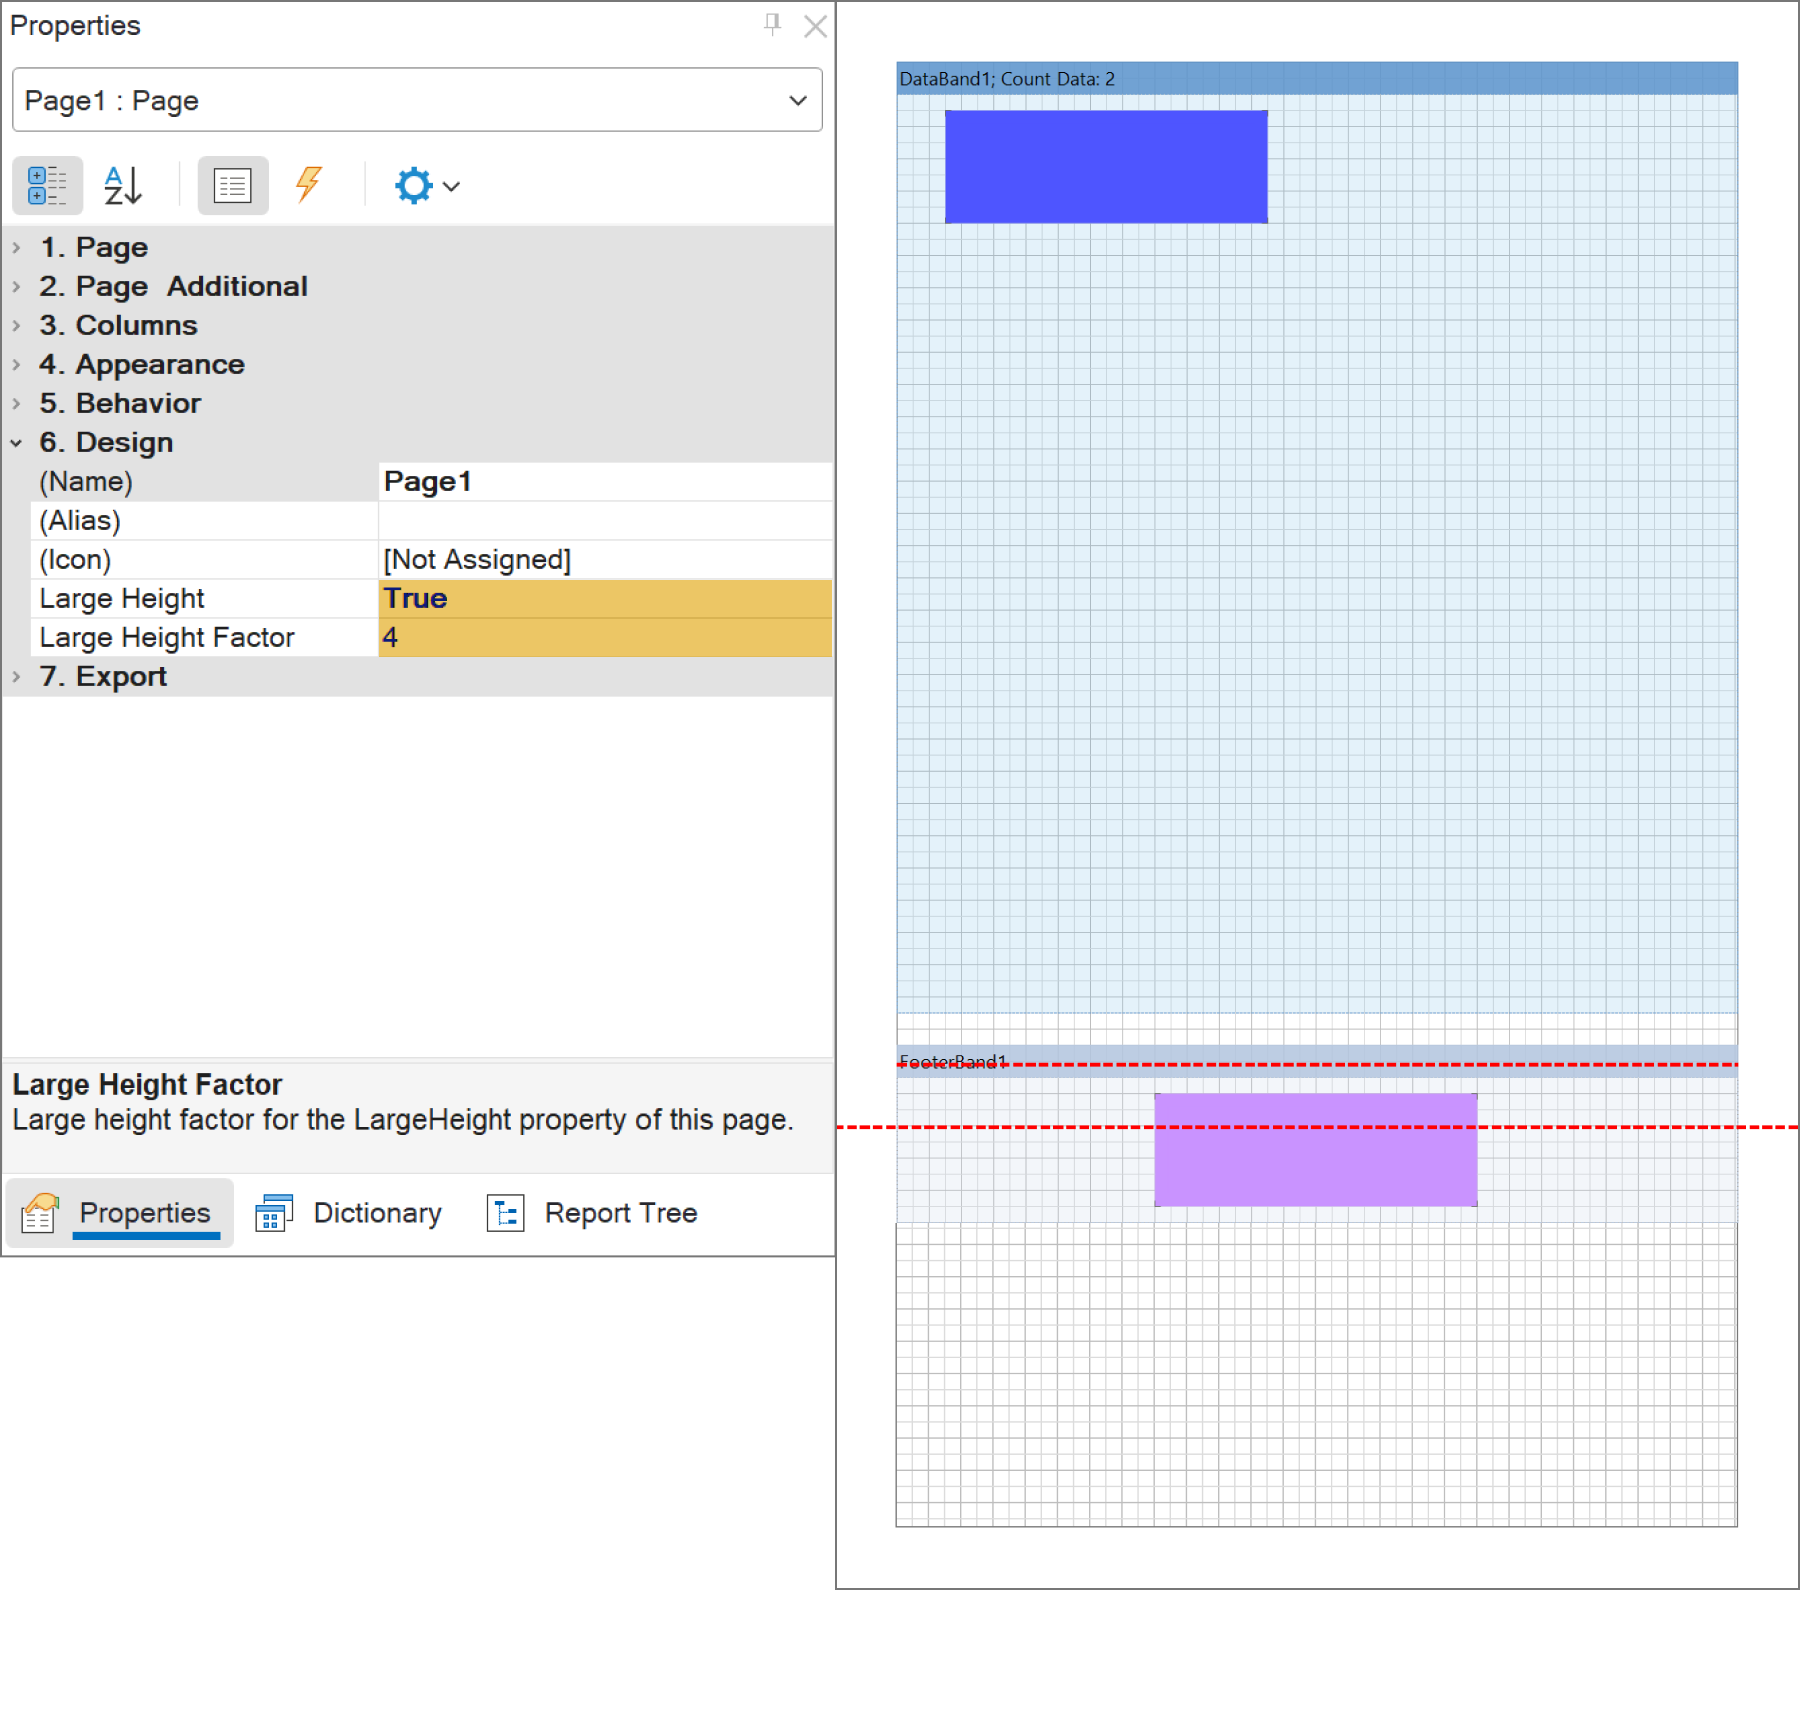
If, for any reason, the automatic functionality is not suitable, you have the option to manually set the increased height of the page. In this scenario, the Large Height and Large Height Factor properties come in handy. Setting the Large Height property to True visually increases the height of the template page by a fixed factor. The height multiplier is determined by the Large Height Factor property, which defaults to 4 and only accepts integer values.
Let's also touch on another noteworthy property of the page - Print On Previous Page. Enabling this property, for instance, on the second page of the template, ensures that the construction of bands on this page does not start anew but continues from where the construction of bands on the first page concluded. This simplifies certain scenarios, such as the one mentioned at the beginning of the article, where multiple tables with different data need to be consecutively placed in a document. If these tables are unrelated, you can position the bands on different pages and set the Print On Previous Page property to True on subsequent pages. This arrangement ensures that the tables display sequentially, with each table on a separate page in the template, enhancing clarity and ease of editing.
The procedure for creating a report
Reports in Stimulsoft products follow the following sequence:- First, the engine receives all necessary data;
- Then, it begins to process the pages of the template one by one, strictly in sequential orde;
- A copy (without bands) is created for each page of the template, which is added to the output document;
- On the template page, the engine renders the bands in order;
- After building all the bands on the template page, the engine moves to the next page.
Most often, bands are associated with data tables. Depending on the amount of data, one band may be rendered in a different number of lines or may not be rendered at all if there is no data. If there are many lines, and they do not fit on one page of the template, then the engine creates another copy of the page and continues to place lines on it. If necessary, it creates another copy, and so on, until all lines of data are placed. Thus, one page of the template can result in several pages in the output document.
Arranging bands on report template pages
Furthermore, practical scenarios often involve the need to consecutively place multiple tables with distinct data in a document. Each table should have its own names, headers, footers, and additional information. Additionally, when dealing with a small amount of data, the table should ideally fit on a single page. This introduces a challenge: in the design mode of the template page, there is a need to organize numerous bands, yet they do not all fit within the page constraints. Please note!The physical dimensions of the page are established through the Page Size property of the report template page. This size applies to both the template page itself and its corresponding copy in the output document. Therefore, during the design-time, the template page is presented with accurate dimensions. This enables the placement of static components, such as background images and texts, in their intended positions. However, bands, being dynamic components not fixed to specific locations on the page, only reveal their positions during report rendering. Consequently, during the design process, bands are simply displayed sequentially from top to bottom. Moreover, for clarity, they are presented with headings and indents between them.
Bands that extend beyond the page are visually hidden beyond the screen's edge. To facilitate editing, we incorporated a specific feature into the designer - automatic adjustment of the page's visual height to accommodate the content. Here's how it functions: when the combined height of all bands on the page surpasses 70% of the page height, the page VISUALLY expands in height, ensuring at least 30% of the original size's free space remains. Consequently, all bands are visible on the page.
Please note!The physical dimensions of the template page and its copies REMAIN UNCHANGED! The page's height only VISUALLY increases during the editing process within the designer.
What about the red lines?
When the visual height of the page increases, two red dotted lines start to appear - indicating the lower physical border and the lower margin of the page.These lines assist in accurately placing static components on the page, such as positioning a logo in the bottom corner.
If, for any reason, the automatic functionality is not suitable, you have the option to manually set the increased height of the page. In this scenario, the Large Height and Large Height Factor properties come in handy. Setting the Large Height property to True visually increases the height of the template page by a fixed factor. The height multiplier is determined by the Large Height Factor property, which defaults to 4 and only accepts integer values.
How to disable the red lines mode?
If, for any reason, you need to view the template page in its actual size, without red lines and additional heights, it's a straightforward process. Set the Large Height property to Yes and the Large Height Factor property to 1.Let's also touch on another noteworthy property of the page - Print On Previous Page. Enabling this property, for instance, on the second page of the template, ensures that the construction of bands on this page does not start anew but continues from where the construction of bands on the first page concluded. This simplifies certain scenarios, such as the one mentioned at the beginning of the article, where multiple tables with different data need to be consecutively placed in a document. If these tables are unrelated, you can position the bands on different pages and set the Print On Previous Page property to True on subsequent pages. This arrangement ensures that the tables display sequentially, with each table on a separate page in the template, enhancing clarity and ease of editing.
If you are reading these lines, you have successfully navigated through the entire article. Well done! :) Thank you for your attention and for investing your time in reading this piece. We value your patience in exploring the content :). If you have any questions, please do not hesitate to reach out to us.