In previous articles we have already reviewed the Stimulsoft Reports component, enabling you to perform certain actions with reports directly in the Internet. Undoubtedly, StiWebViewer is very simple and easy to use; however, it is slightly limited in some of the features. Of course, its functionality is more than enough for everyone, but if you want more, then ..., for such people, Stimulsoft Company provides a special component StiWebViewerFx.
To find StiWebViewerFx do not make any unnecessary body movements. The StiWebViewerFx component is delivered as a part of Stimulsoft Reports.Web and Stimulsoft Reports.Ultimate.
As it has become clear, it is used to display reports in a web browser. In this article we will examine how to work with the StiWebViewerFx component. Let’s get started:
First, consider what should be done for further displaying reports.
To make your report "beaming" in the Internet space, you should do the following:
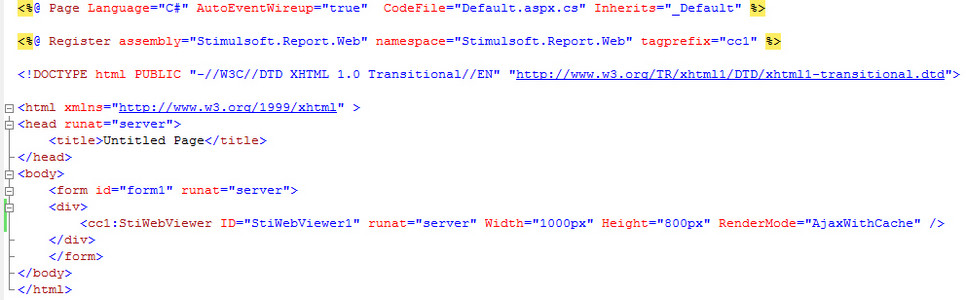
1) Put the component in an HTML web page code.
2) Use the following code to load the report in the web Viewer:
C#
After the viewer is loaded, the report is loaded using the OnGetReport event. This event, after subscribing to it, will occur every time when a viewer will need a report.
Below is a sample code using the OnGetReport event:
If you want to appear WebViewerFx the entire area of the browser window, you should use the following code:
Let us review the basic items of WebViewerFx clearly and precisely (see the picture below):
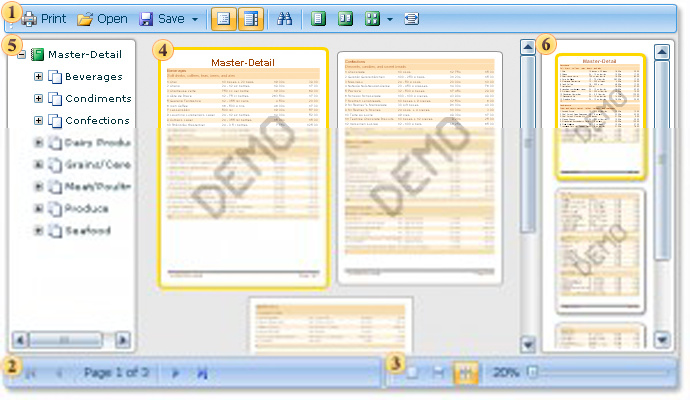
1) The toolbar contains the main report controls.
2) The toolbar is used to switch pages in the report, so-called "pagination."
3) The toolbar to select the displaying mode of the report.
4) The displayed report.
5) The bookmark tree of the displayed report. Switching bookmarks the user can navigate along the structural elements of the report.
6) This pane displays page thumbnails in the report. The panel is designed for quick report navigation.
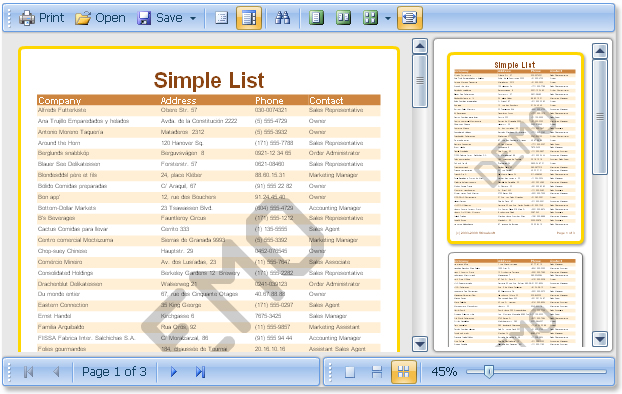
Let’s see the main toolbar of WebViewerFx, and its controls:

1) This button runs the report printing. When clicked, the print dialog is displayed. A user can select print options there.
2) With this button you can open a previously saved report.
3) Saves the rendered report into various file formats.
4) Using these two buttons it is possible to make the tree of bookmarks visible or hidden. A small feature that is worth to know is that if there are no bookmarks in the report, the viewer will automatically hide the bookmarks tree when showing this report. If there are bookmarks in the report, the viewer will automatically display a bookmark tree.
5) Shows or hides the thumbnails bookmark of report pages.
6) The button enables a search bar in the rendered report.
7) Changes the report zoom. The report is displayed the way a page fits in the viewer window height.
8) Changes the report zoom so that the width of the viewer fits in two pages of a report.
9) Changes the report zoom according to the specified size of pages horizontally and vertically.
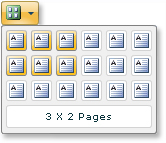
10) Changes the report zoom so as to fit as many report pages as there are selected.
Let’s review the pagination toolbar in WebViewerFx:
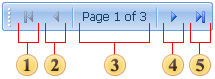
1) Sets the first report page as the current one.
2) Sets the previous report page as the current one.
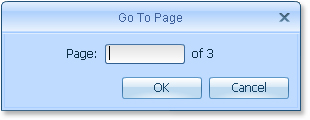
3) This control displays the current page number and the number of pages in the report. It is also possible to enter the page number you want to make the current one.
4) Sets the next report page as the current one.
5) Sets the last report page as the current one.
To find StiWebViewerFx do not make any unnecessary body movements. The StiWebViewerFx component is delivered as a part of Stimulsoft Reports.Web and Stimulsoft Reports.Ultimate.
As it has become clear, it is used to display reports in a web browser. In this article we will examine how to work with the StiWebViewerFx component. Let’s get started:
First, consider what should be done for further displaying reports.
To make your report "beaming" in the Internet space, you should do the following:
1) Put the component in an HTML web page code.
2) Use the following code to load the report in the web Viewer:
C#
StiReport report = new StiReport();
report.Load("report.mrt");
StiWebViewerFx1.Report = report;Dim Report As StiReport = New StiReport()
Report.Load("report.mrt")
StiWebViewerFx1.Report = ReportAfter the viewer is loaded, the report is loaded using the OnGetReport event. This event, after subscribing to it, will occur every time when a viewer will need a report.
Below is a sample code using the OnGetReport event:
protected void StiWebViewerFx1_GetReport(object sender, StiWebViewerFx.StiOnGetReportEventArgs e)
{
	StiReport report = new StiReport();
	report.Load("D:\\SimpleList.mrt");
	e.Report = report;
}If you want to appear WebViewerFx the entire area of the browser window, you should use the following code:
StiReport report = new StiReport();
report.Load("report.mrt");
StiWebViewerFx1.View(report);Let us review the basic items of WebViewerFx clearly and precisely (see the picture below):
1) The toolbar contains the main report controls.
2) The toolbar is used to switch pages in the report, so-called "pagination."
3) The toolbar to select the displaying mode of the report.
4) The displayed report.
5) The bookmark tree of the displayed report. Switching bookmarks the user can navigate along the structural elements of the report.
6) This pane displays page thumbnails in the report. The panel is designed for quick report navigation.
Let’s see the main toolbar of WebViewerFx, and its controls:
1) This button runs the report printing. When clicked, the print dialog is displayed. A user can select print options there.
2) With this button you can open a previously saved report.
3) Saves the rendered report into various file formats.
4) Using these two buttons it is possible to make the tree of bookmarks visible or hidden. A small feature that is worth to know is that if there are no bookmarks in the report, the viewer will automatically hide the bookmarks tree when showing this report. If there are bookmarks in the report, the viewer will automatically display a bookmark tree.
5) Shows or hides the thumbnails bookmark of report pages.
6) The button enables a search bar in the rendered report.
7) Changes the report zoom. The report is displayed the way a page fits in the viewer window height.
8) Changes the report zoom so that the width of the viewer fits in two pages of a report.
9) Changes the report zoom according to the specified size of pages horizontally and vertically.
10) Changes the report zoom so as to fit as many report pages as there are selected.
Let’s review the pagination toolbar in WebViewerFx:
1) Sets the first report page as the current one.
2) Sets the previous report page as the current one.
3) This control displays the current page number and the number of pages in the report. It is also possible to enter the page number you want to make the current one.
4) Sets the next report page as the current one.
5) Sets the last report page as the current one.