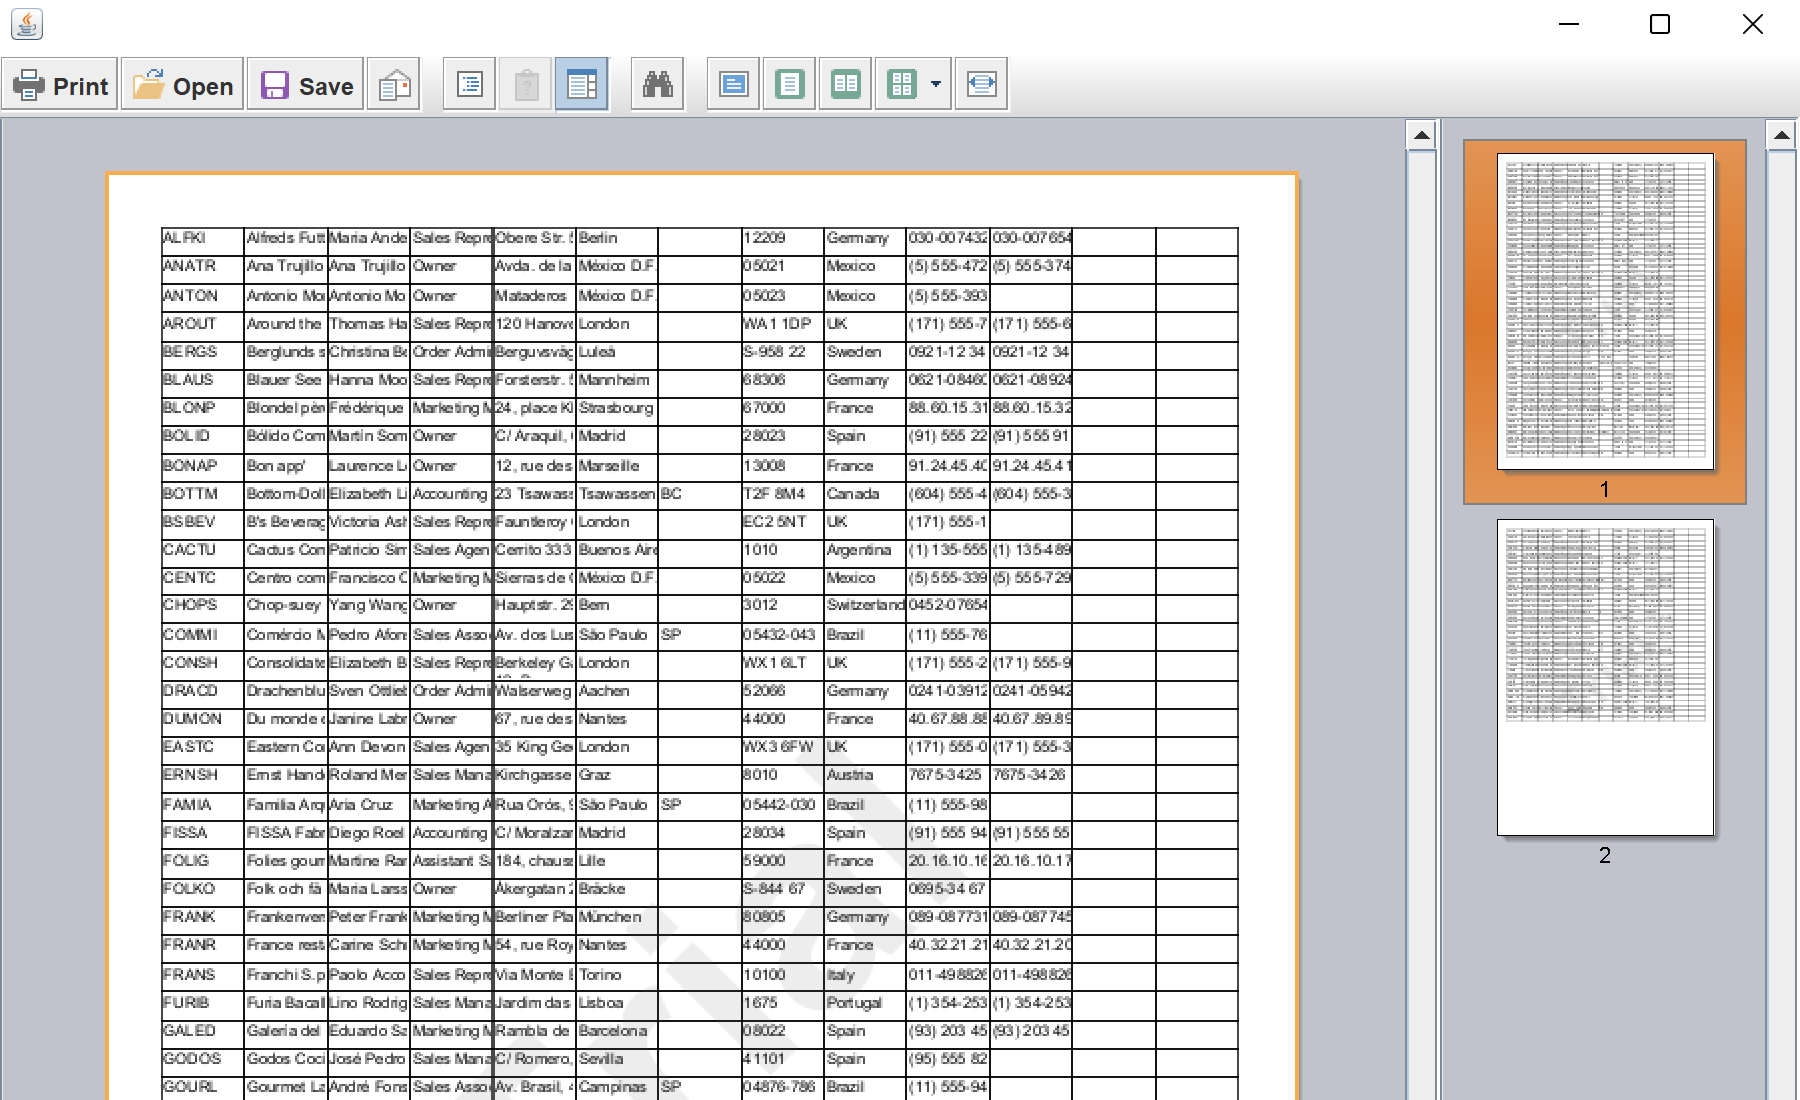
This sample project shows how to create a new report with MySQL fields and exctract MySQL database information.
First, you need to create a new report and add a MySqlDatabase. In the constructor of the
StiMySqlDatabase class you should setup a database name, alias and connection string:
public static StiReport createReport() throws ClassNotFoundException, SQLException, StiException, FileNotFoundException {
	StiReport report = StiReport.newInstance();
	StiPage page = report.getPages().get(0);
	report.setDictionary(new StiDictionary(report));
	StiMySqlDatabase db = new StiMySqlDatabase(
		"test", "test", "url=jdbc:mysql://localhost:3306/sakila;user=root;password=terra2;database=sakila");
		report.getDictionary().getDatabases().add(db);

...
Next, we need to create a data source. Create the
StiMySqlSource object, extract the 'actors' data table fields and populate this data source:
...

	StiMySqlSource source = new StiMySqlSource("test.actors", "actors", "actors", "select * from actor");
	source.setDictionary(report.getDictionary());
	report.getDictionary().getDataSources().add(source);
	source.setColumns(new StiDataColumnsCollection());
	StiMySqlAdapter adapter = new StiMySqlAdapter(db.getConnectionString());
	Class.forName(adapter.getDriverName());
	Connection con = com.stimulsoft.webdesigner.helper.StiDictionaryHelper.getConnection(adapter.getJdbcParameters());
	StiTableFieldsRequest request = StiDataColumnsUtil.getFields(con, source.getQuery(), source);
	for (StiSqlField field : request.getColunns()) {
		source.getColumns().add(new StiDataColumn(field.getName(), field.getName(), field.getSystemType()));
	}

...
The data source is created, now we need to display the data on the report page. Add a new
StiDataBand component to the report page and the
StiText components for all data columns. Also add the captions for header:
...

	StiDataBand dataBand = new StiDataBand();
	dataBand.setDataSourceName("actors");
	dataBand.setHeight(0.5);
	dataBand.setName("DataBand");
	page.getComponents().add(dataBand);

	double pos = 0;
	double columnWidth = page.getWidth() / source.getColumns().size();
	Integer nameIndex = 1;
	for (StiDataColumn dataColumn : source.getColumns()) {
		// Create text on header
		StiText hText = new StiText(new StiRectangle(pos, 0, columnWidth, 0.5));

		hText.setTextInternal(dataColumn.getName());
		hText.setHorAlignment(StiTextHorAlignment.Center);
		hText.setName("HeaderText" + nameIndex.toString());
		hText.setBrush(new StiSolidBrush(StiColorEnum.Orange.color()));
		hText.getBorder().setSide(StiBorderSides.All);

		StiText dataText = new StiText(new StiRectangle(pos, 0, columnWidth, 0.5));
		dataText.setText("{actors." + dataColumn.getName() + "}");
		dataText.setName("DataText" + nameIndex.toString());
		dataText.getBorder().setSide(StiBorderSides.All);
		dataBand.getComponents().add(dataText);
		pos = pos + columnWidth;
		nameIndex++;
	}

...
Finally, render the created report using the
Render() method of the report object, and return the result:
...

	report.Render();
	return report;
}
To display report we use a native Java viewer. We need to create the viewer object, add the necessary event listeners and assign the report:
public static void showReport(StiReport report) {
	JFrame frame = new JFrame();
	JPanel panel = new JPanel();
	panel.setLayout(new BoxLayout(panel, BoxLayout.Y_AXIS));
	panel.setPreferredSize(new Dimension(1000, 1000));
	StiViewerFx viewerPanel = new StiViewerFx(frame);
	panel.add(viewerPanel);
	frame.add(panel);
	frame.setSize(new Dimension(1000, 1000));
	frame.setLocationRelativeTo(null);
	frame.setDefaultCloseOperation(JFrame.EXIT_ON_CLOSE);
	frame.setVisible(true);
	viewerPanel.getStiViewModel().getEventDispatcher()
		.dispatchStiEvent(new StiViewCommonEvent(StiViewCommonEvent.DOCUMENT_FILE_LOADED, new StiDocument(report), null));
}

public static void main(String[] args) throws ClassNotFoundException, SQLException, StiException, FileNotFoundException {
	StiReport report = createReport();
	showReport(report);
}
На скриншоте ниже Вы можете увидеть результат выполнения данного кода:
